-40%
HPE 9500 2.4/8C/32 CB900s/BL8X0C/RX2800 I4s,Itanium 2 8Cores CPU ,Qty Avail
$ 105.6
- Description
- Size Guide
Description
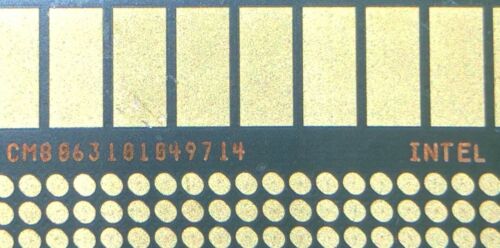
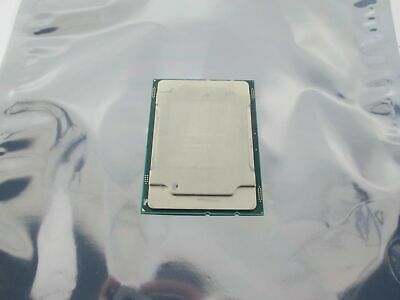
HiI have these Intel Itanium 2 CPU, ‘Poulson’,CPU(not officially released).Intel part # CM8063101049714, AT085-2008A,95XX-ES, 2.4Ghz, 8Cores, L3 cache-32mb, CPU for Blade Servers BL8XXC i4, CB900s I4 and RX2800 I4, for sale.
Detected as 9550 as it has a similar speed but 8cores! This sale is for a single Processor.
I test all processor prior to shipping. All processors has Serial #.These CPU’s specification can be viewed In ILO or maintenance OS. All processors are guaranteed in good working condition or moneyback!!!
You can actually replace your current Processors and replace with this Processor to get a IMMEDIATE CASH BACK**+. All your current licenses are not affected or need to be changed!
Almost anyone who has some experience installing or removing CPUs in a computer environment can remove and install this CPU in a blade or rack mount server. When in doubt, ASK!
Please see photos 1-11 for instructions on how to change the CPU. Easy to follow step by step instructions.
These CPUs’ speed sit between 9560 and 9540. Has a similar speed at 2.4ghz like the 9550 but having 8 cores instead of 4 cores. The accompanying chart shows the position/ranking of this CPU in the 8 variations of officially released 95xx and the 97xx line up.
CM80631010497806-9520-1.73/4C/20mb
CM8067901049809-9720-1.73/4C/20mb
CM80631010497807-9550-2.40/4C/32mb
CM8067901049811-9750-2.53/4C/32mb
CM8063101049718-9540-2.13/8C/24mb
CM8067901049718-9740-2.13/8C/24mb
CM8063101049714-95xx-2.40/8C/32mb*
CM8063101049716-9560-2.53/8C/32mb
CM8067901049720-9760-2.66/8C/32mb
I ship these by FedEx on International Priority. Typical delivery lead time is between 2-5 business days, depending on your locations, with the exception of Custom’s intervention. Tracking # will be uploaded on eBay’s post sale notification page when available. You may want to track by keying tracking # at www dot FedEx com dot sg. An email will be sent to the buyer by eBay. Paid shipping does not include Customs or other import fees imposed by destination country, if any. FedEx may charge a nominal Admin fee if duties is paid on buyer’s behalf. Please take note.
It is the responsibility of the buyer to check your country’s Custom prevailing practices, to avoid surprises.
Instructions for changing existing I4 CPU to this CPU. Please note!
1.
Removing the CPU assembly from server board socket
a. Lift heatsink handle upward. (photo 1) This handle will remain in this position throughout the whole procedure. Take care not to fiddle with this handle as the clamping action can cause serious injury to your fingers.
b. Extend the 2 small transparent plastic toward you.(photo 2) These are used to lock or unlock the assembly to the board socket’s rear vertical posts.
c. Remove the VRM board(Voltage Regulating Module) power plug from Server board power socket.(photo 3)
d. Lift vertically to remove CPU assembly from board socket.
2.
Removing the existing CPU and replacing it with the new CPU
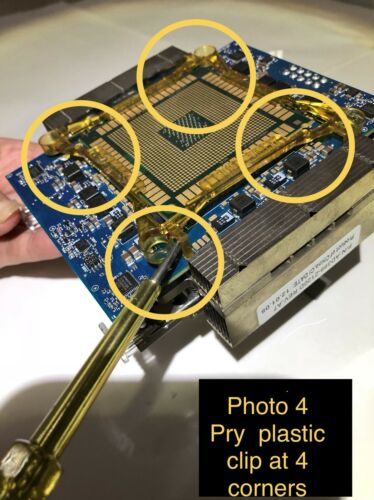
a. Use a test pen type (- minus) screwdriver to pry open the CPU plastic retaining clip.(photo 4) For blade and Superdome, you must open all 4 corners to release the retaining clip. Method: use the round corners as a fulcrum to pry. Use gentle force!
b. Use test pen screw driver’s tip to pry open the processor from the VRM board’s 2 lower corners(facing you). Use gentle force in rocking up down motion. (The adhesion of the thermal paste is very strong. Pry both ends as indicated. Remember position of the ‘bar mark’ on the underside comer of CPU which should be on the left side facing you. This is an important aspect as if you do not place the CPU in this position, the server will not boot! The wire protruding from the VRM should be on the opposite end, away from you.(photo 5)
c. Attached the plastic retaining clip to the VRM board.(to minimize chances of touching the pins while cleaning. the thermal paste off the heatsink) Clean excess thermal paste on the heatsink using provided cotton buds by gingerly rotating the bud while it pick up thermal paste. You may need some quantity of cotton buds doing so.. Take care not to smear paste on VRM board or the surrounding pins..(photo 6)
d. Apply thermal paste toward the centre of heatsink as indicated. (Photo 7) Apply all the content of 2 syringe provided.
e. Remove the retaining clip from the VRM board. Position the CPU in the correct orientation as it was previously removed. Please ensure that the ‘Bar Mark’ on one of the corner underside of the CPU is on your bottom left. The orientation is such that the VRM power wire is on the opposite end, away from you.This is very important!
Ease CPU gently within the pins’ boundary on all 4 sides. There should be no or little movement when placed correctly. Underside ‘Bar Mark’ must be on the left side as indicated. (Photo 8) Attach the retaining clip. Gently press using both thumbs on 4 corners to ease the CPU onto the heatsink to ensure optimal adhesion.(photo 9)
3.
Placement of the CPU assembly to the server board socket
a. Gently align the 4 holes on the CPU assembly with the 4 Server board’s vertical posts as indicated.(photo 10) Before doing this, please ensure that the 2 plastic tabs are fully extended otherwise it will block the holes and prevent you from lowering down the CPU assembly onto the board socket.
b. Once the CPU assembly is sitting firmly on the board’s socket, push the 2 transparent tabs inward to the assembly. Slowly clamp down the handle downward while restraining the movement with your other hand’s index and middle fingers. Lower until you hear a click sound.(photo 11)
C. Attach the VRM power plug to the Server board socket.
You have completed the replacement of CPU process! If you have any questions pertaining to this replacement, please ask !
Thank you for considering.
Feedbacks are the cornerstone of eBay's policies. They make eBay a better and safer place to shop and to sell and because what you say in Feedback has a great bearing in telling others about the demeanour and character of a particular seller or buyer, I must ask you t o be honest and truthful in your comments. Say what you mean and mean what you say. As a seller, I try to bring the best experience, shopping in my store. If you have a positive experience doing so, do not be afraid to say your best, because if you do, I will be able to continue to bring the goodness to you over and over again. I strive to outdo myself. And if something is not right, I will make it right! That’s is a promise!
Thank you again.
